Friday, December 23, 2022

Baking Bread Aboard on a Cold Winter Day

One of the things we love about living aboard is something we call consciousness of consumption.  On a small boat, with limited space and resources, we tend to be very aware of all the "stuff" we need and want.  The boat makes us very aware of the difference between those two things!  Do I want more than three pairs of shoes?  Yes, very much.  Do I need more than three pairs of shoes?  No.  We have the flip flops, the walking shoes, and the boots.  There's simply not any room for more than that.  Do I want more than four plates, four knives, four spoons, etc?  Of course!  The boat tells me I don't need them, though.  Heck, Damon and I almost got in a fight over buying a pot.  Me?  I said no, we have already have our pressure cooker.  There's no room for a second pot.  That's crazy talk.  Damon?  Definitely wanted/needed a small pot.  How could we possibly make soup in a pressure cooker?  (Alright, he was correct, we have room.  I still think he can make his soup in the pressure cooker though!)

I love to cook and bake, so leaving our Creuset cast iron Dutch oven behind was difficult.  We got it as a wedding present and for 25 years it faithfully served as a pot-roast/soup/bean/stew maker that never failed me.  About a dozen years ago I found the New York Time's no-knead bread recipe, which calls for baking bread in a Dutch oven, with the Creuset being ideal.  After years of being a mediocre bread baker, this recipe was a game changer.  It got us through many a Maine snow day and fed huge groups on Kent Island (the field station we ran in summer in the Bay of Fundy).  

Alas, Fulmar isn't Creuset friendly.  Way too big, way too heavy.  Our pressure cooker does a great job with soups and stews and such (and saves a ton of propane), but I'm just not that keen on baking bread in it (yes it can be done).  What's a bread lover to do?  How would I get those crispy crusts and lovely loaves?  Well in summer I often use our solar cooker.  How about when it's cloudy, or I'm just too lazy to trot that thing out?  Or maybe I want to warm up the boat (it's going to be 26 tonight so we're all about using the stove today).

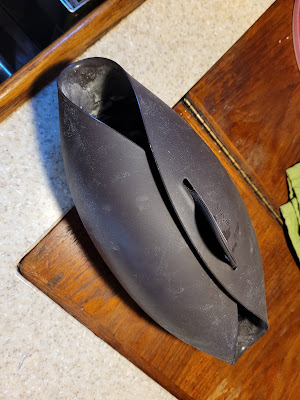
Ladies and gents, I give you the Lekue!  (FYI we do not monetize anything.  This is just a link.)  The Lekue is a silicone bowl/baking dish that's perfect for a boat.  It takes almost no space to store and is lightweight.  I mix my dough right in the Lekue, let it rise in there, and bake it.  No muss, no fuss.  It's one of my favorite boat gadgets!  How's it work?

A brown, silicone bowl that is the Lekue has flour in it, and there is a measuring spoon that has flour in it on the counter.

My recipe is simple:  2 cups flour and 1 cup water.  I add some salt.  I know, it's be better to weigh it all out.  Let's be real, that's not happening on this boat.

A measuring cup has frothing yeast water in it and a white container shows a packet of yeast

I like to give my yeast a head start. I use my 1 cup warm water, some honey, and some flour and mix it with my yeast, allowing it to get frothy, which takes 5-10 minutes.  Then I toss the brew in the Lekue with the flour.  It'd be better to make a sponge but again, let's be real.  This is minimalist boat-bread-baking 101!

A hand is kneading a lump of dough in the Lekue

I could do this as a no-knead bread if I wanted to let it sit 8 hours.  Today I decided I wanted a finished loaf a bit sooner, so I just kneaded it for five minutes right in the Lekue.  I don't really worry about texture (because I'm lazy).

The Lekue is closed around the dough.  There is a tab at the top that is closed.

Then I close up the Lekue...

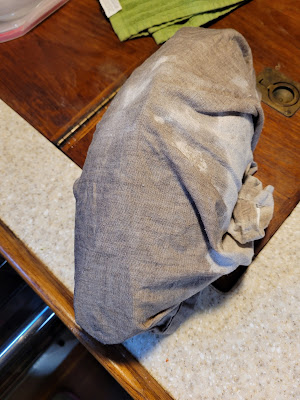
A linen napkin has water drops on it and is wrapped around the Lekue.

...and I wrap it in a moist napkin.  Into a warm oven it goes.  Every half-hour or so I pulse the propane on for about ten seconds, just to warm up the oven.  Or I forget and don't.  It all seems to work out. 

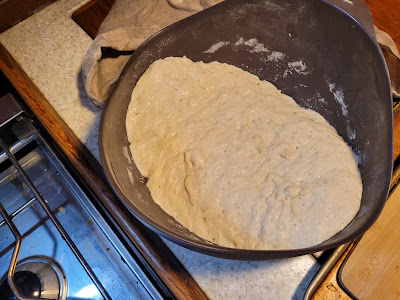
The Lekue is open and the dough looks bigger and pump.

After a few hours I check to see what's going on.  Hopefully it's doubled in volume.  If it has, I punch it down and knead it for a minute or two, forming it into a nice ball.  I let that rise a second time for about an hour (or the amount of time it takes to walk the dog down to the marina office to pick up packages, like a two mile walk with an easily distracted dog.)

The Lekue is open and the dough is formed into a nice ball.

Now we're ready for the oven!  It's risen into a big ball and when I poke it, the indentation stays.  Yippee!  Bread is imminent!  Get that oven preheated to ~400F.

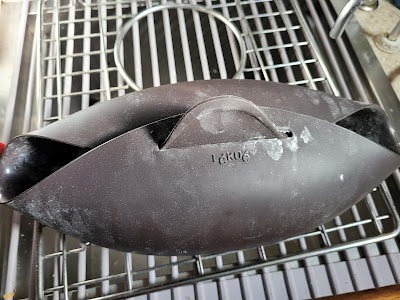
The Lekue is closed up around the dough.

I close the Lekue.  This keeps the steam contained, which helps make a crispy crust.

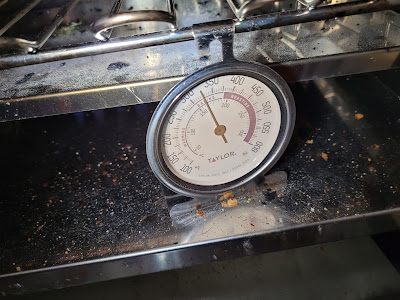
An oven thermometer reads 320 degrees

The oven thermometer is a vital piece of equipment on Fulmar.  (The boat oven is a fickle thing that likes to play tricks if you don't hold it accountable.)  Once you see 400 degrees, toss that Lekue (closed) into the oven.  Set a timer for 30 minutes.  Read a book, clean the sink, snuggle the dog.

The Lekue is open and shows a loaf of bread that is nice but not as brown as would be desired.

Here's the result.  Nice but not quite as brown as I'd like.  I take it out of the Lekue at this point and put it right on the oven rack for about ten minutes.

A browned loaf of bread sits on a cutting board.

Now here's a lovely loaf of bread, don't you think?

The bottom of the bread looks a bit shiny.

Full disclosure:  there is one thing I don't love about these loaves.  They get these strange smooth bottoms on them.  Still crispy and delish but a bit odd.  Luckily I forget all about it when I'm shoving warm bread down my pie hole.


So that's it.  I lost a Creuset but gained a Lekue.  I still look forward to getting that Dutch oven back someday.  Until then, we'll have to make due on Fulmar.  Now if you'll excuse me, I have some bread to eat!

Wednesday, December 21, 2022

The Changing of the Engine Mounts

The 4 old engine mounts on the left and one of the new mounts that replaced them.


(Boredom Alert: This post details an engine maintenance project. If mechanical stuff isn't your cup of tea, carry on with your day.)

Ask cruisers to give a definition for “cruising” and most will say something like “Fixing your boat in exotic locations.”  It’s true, boat ownership involves a lot of time spent fixing and maintaining stuff.  It doesn’t matter what kind of boat you have or how new it is.  

Fulmar is a relatively simple boat, by intention.  Less stuff to break means less time fixing stuff and more time sailing.  At least that’s the idea.  But Fulmar is a 40 year-old boat.  So, in addition to regular maintenance, like engine oil and filter changes, we often have to do things that are a bit more complicated.  There’s a never-ending to-do list.  Usually for every item we check off the list, we add 2 or 3 more.  It can be frustrating but we enjoy the challenge and get satisfaction out of accomplishing each task.  We’ve become pretty good at diagnosing and fixing problems, which is helpful because things rarely break at convenient times or locations, so being self-sufficient is a plus.  And we’ve learned some expensive lessons by paying others to do work on our boat.  If you want something done right, it’s best to do it yourself.  At least you’ll know who to blame when it breaks.  


But boat projects have a way of spiraling out of control, becoming much more complex and taking much longer than planned.  Our recent project to replace Fulmar’s engine mounts is a good example.  Engine mounts are an unseen and unappreciated part of a boat.  They attach the engine to the boat.  Without them, you’d be dead in the water.  As the mounts age, their ability to act as shock absorbers diminishes, so engine vibration and noise increases.  This is not just annoying; it can damage your engine.  Most marine mechanics recommend changing engine mounts every 5-10 years.  We think Fulmar’s mounts have been in service for 16 years, so it was way past their time. The process of changing the mounts seems simple enough: block up the engine so that it stays put and disconnect the propeller shaft so that it isn’t accidentally moved out of position, take off one mount at a time (along with the bracket that attaches it to the engine), adjust the height of the new mount to match that of the old one by turning a nut, bolt the mount and bracket back onto the engine, and proceed to the next mount.  There are four mounts, and a total of 26 bolts.  At the end, you just have to make sure the engine and propeller shaft are properly aligned.  We figured the whole job should take 1 or 2 days.  But we’re savvy enough to understand the Boat Project Time Multiplier.  This well-established mathematical equation is 

(X + 0.5X) × 3


where X is the time (in days) that you think a project should take.   So the project that we originally estimated to take 2 days, should have actually taken us 9 days to complete ((2 + 1) × 3 = 9).  If only we were that lucky.


Each mount and the bracket that holds it to the engine were removed one at a time, while the engine was held in place by a jack below it and block & tackle holding up the front and rear of the engine (as well as by the other 3 mounts). We took great pains to make sure the engine did not move. The mounts attach to the four corners of the engine, down low.

All was going well until the very end.  After we changed all of the mounts, we couldn’t get the engine to align with the propeller shaft.  The amount of adjustment needed was way more than the mounts would allow.  The new mounts were identical to the old ones and we made sure the engine stayed put during this entire process.  So we couldn’t figure out what had changed.  The most plausible explanation is that nothing changed; the engine was severely misaligned prior to our starting the project and we just hadn’t noticed it until now.  It is hard to believe that the engine was so badly misaligned for its entire life (this engine has been in the boat for 16 years).  It seems likely that this problem started more recently.  We had the cutlass bearing (the bearing that supports the propeller shaft, where it enters the hull), replaced by a boatyard in 2018.  We’re guessing the bearing was installed improperly, causing the shaft to be crooked.  So now we need to align the engine to a shaft that is off-center (Not an ideal situation…we’re going to investigate this the next time we haul out).  But how do we get these two immovable objects to come together?  Try as we might, the engine mounts and brackets didn’t allow for nearly enough lateral adjustment of the engine.  We tried moving that engine with jacks, long levers, and block & tackle.  But just when we thought the engine was adjusted properly, it would spring back as we tightened the bolts.  

The problem: that's the back of the transmission on the right (the red thing) and the beginning of the propeller shaft on the left.  Those 2 stainless steel flanges that connect the shaft to the transmission are supposed to line up perfectly, with a margin of error of just 0.003".  It's difficult to see from this photo but the two flanges are off-center by more than an 1/8" and there is also about a 1/8" gap between them on the starboard side (the bottom of this photo).  And that's as close as we could get them, which might as well have been a mile apart.


Despite using two jacks, long levers, and this 4-part block & tackle strung across the cabin, we were unable to coax the engine into position.

We removed the bolts holding one of the mounts to the boat, allowing it to slide freely on the engine bed.  You can see how far the mount moved relative to its bolt hole. This amount of misalignment is really bad for the transmission, propeller shaft, and the bearing that supports the shaft.  Notice there is no allowance for either the mount or the steel bracket to be adjusted laterally. That's a problem!


At this point we were still in disbelief about the situation. We saw four potential solutions that ranged from free to really expensive; quick & easy to long & complex; temporary stopgap to longterm; and permanent to reversible. So we spoke to our friend, Hood, who is a marine mechanic, and she brought up several good points that helped us decide how to proceed. We chose to elongate the bolt holes in the brackets making them into oblong slots, giving us freedom to adjust the engine from side to side. We knew we could get this done pretty quickly and cheaply at a local shop and that if, in the future, we discover that the cutlass bearing is causing the shaft to be off-center, then we can easily undo our modifications by loosening 4 bolts and shoving the engine back from whence it came.

Enter the heroes of this story.  We brought the engine brackets, one at a time, to a fantastic local shop, called Jack’s Driveline & Machine.  As soon as we arrived, Jack’s crew dropped what they were doing, figured out what needed to be done, and cut the slots into the half-inch steel brackets quicker than you could slice through a stick of warm butter.  These guys are problem solvers. But even after Jack’s team cut the slots in all 4 brackets, we had to bring one back again to have the slot lengthened.  We also had to reposition the two forward mounts and drill new bolt holes in the engine bed to allow for enough adjustment.  The front of the engine needed to move way over.  

Here is the same mount as that shown above, after Jack's crew elongated the bolt holes to allow the engine to be adjusted from side to side.  You can see the inside edge of the slot they made in the bracket, just to the right of the nut that is threaded onto the vertical stud. You can also see at the base of the mount that we filled in the old bolt hole in the fiberglass engine bed with epoxy and drilled a new hole to reposition the mount.


Once we got everything freed up to move sufficiently, we were able to align the engine and put everything back together…after 22 days of work.  The best part of this entire project is that we didn't break anything. Nothing adds more time to a project than snapping off bolts or breaking vital components, which is easy to do when handling such heavy loads.


When we started the engine, we immediately noticed that it was running smoother and the gearbox was quieter; good signs for increasing their lifespans.  It's amazing how the sound of a purring engine and a spinning propeller can brighten your mood after so much frustration.  And this is how a 2-day maintenance job stretches past 3 weeks.  Just another typical boat project!